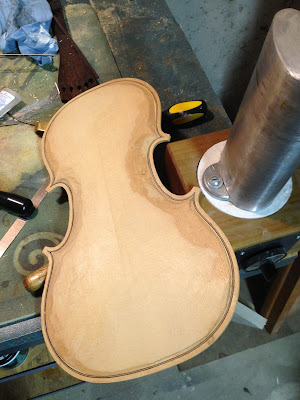
Though cutting the purfling channels was a difficult and tedious task- bending, cutting, and installing the purfling itself proved to be much easier and quite fun! One can make one's own purfling, but it can also be purchased pre-made and I saw no sense in going through those steps when the "standard" black-white-black is what is called for. In the picture on the left you can see the top with the purfling laid in place, but not yet glued. I used the bending iron pictured to bend the strips into the outlines for the top and back. On the top I used 6 pieces with a joint at the center joints because those areas get notched for the saddle and neck. For the back I used 4 pieces so that the only joints are on the corners. Once the basic shapes were formed, I had to carefully match up the two corner pieces and make certain each piece was neither too short nor too long. I did not opt for the traditional Stradivarius 'stingers' - where the outer black strip of purfling protrudes like a needle into the corner - instead opting for elongated corners. Being a person increasingly skilled at minute details like this, I found this no trouble at all. Gluing was just a matter of heating the hide glue, brushing it into the channels, and pressing in the pre-fit pieces. After the glue dried I used a small amount of putty on the top plate to fill in a few places where the channel was not quite perfect, this should be unnoticeable in the finished product. I am now onto refining the shape of the outer arches of each plate. This is also a time consuming task, but for some reason one I don't find terribly tedious, maybe because the more I work the wood, the more it begins really looking like a violin!


No comments:
Post a Comment